Showing posts with label ford. Show all posts

Friday, December 27, 2013

10 Cars That Probably Should Not Have Hit the Road

1. AMC Pacer
More denounced for its unusual styling than its actual performance as a car, the AMC Pacer is a classic automotive flop.


2. 1981 Cadillac Fleetwood V8-6-4
The Cadillac Fleetwood V8-6-4 had the potential to be a good car, had the engineers at Caddy stuck with a traditional engine. Instead, they got a little ahead of themselves, and opted to add a primitive form of cylinder deactivation to keep up with the CAFE standards.


The Ford
Pinto is one of the most infamous examples of automotive flaws, for the unfortunate placement of the fuel tank behind the rear bumper.


From http://wallstcheatsheet.com
Find out more here :

10 Cars That Probably Should Not Have Hit the Road


Monday, December 23, 2013

Denim Machine

Denim Machine If you weren't around in the seventies you may have never seen one of these. 

Denim Machine Meets All Your Coca-Cola, Levis, and HOT ROD Needs - HOT ROD Homecoming 2013 - Hot Rod Magazine Blog
I decided to add a skin for this vehicle to the skin collection at HIDRA. I choose to skin the Vandura I realize the actual DeminMachine is a ford but at the time I had about 50 of these Vanduras, so I choose to skin it instead I am sure the skin could be transferred to a Ford Van should I have one come available to skin.


Wednesday, December 11, 2013

Tuesday, December 10, 2013

New Upgrades


Great news from CarTown -EX , from : https://www.facebook.com/CarTownExCommunity
Six new Upgrades have been added to workbay job drops and Upgrade Mystery Boxes. These are made for U.S. makes Ford (including Shelby), Chevrolet (including Chevy), and Dodge (including SRT). The Upgrades added are:

* Ford Racing Turbo
* Ford Racing Turbo SE
* Chevrolet Racing Turbo
* Chevrolet Racing Turbo SE
* Dodge Racing Turbo
* Dodge Racing Turbo SE

Sunday, November 17, 2013

Cartown - EX releases 2 classics

The '65 Ford Mustang Convertible and the '67 Chevrolet Camaro Convertible is now available in Car Town EX!. Hostile Racing hasn't picked these up yet not sure if I will or not. All of us here at HIDRA are waiting in hopes to see a Chevrolet Vega soon.

Tuesday, November 12, 2013

Team Cup Round 3: USA

The Team Cup Round 3 is coming this weekend at CarTown-EX, don't miss the action and prizes. This past week Hostile Racing netted 4's across the board earning no trophy this week, but still 300,000 gold coins and 30 CarTown-EX Blue Points. Mazda took the overall Team Championship last week, with the participating Mazda team members receiving 40 Blue Points each.

From CarTown-EX :
The Team Cup Round 3: USA is coming this weekend!


Bracket A:
This is the professional's bracket, time to get those racecars tuned!
Any US Manufacturer's car (Star or A Class only

Any US Manufacturer's car (Star or A Class only)

Open period:
2013/11/15 16:00 〜 2013/11/18 15:00 (Japan Standard Time)


Bracket B:
The Team Cup Round 3: USA is coming this weekend!
Get that US muscle out to the racetrack!

Any US Manufacturer's car (B Class only)

Open period:
2013/11/15 16:00 〜 2013/11/18 15:00 (Japan Standard Time)


Bracket C:
The Team Cup Round 3: USA is coming this weekend!
For US Tuners of small and mid-sized cars!

Any US Manufacturer's car (C or D Class only)

Open period:
2013/11/15 16:00 〜 2013/11/18 15:00 (Japan Standard Time)

Legendary Upgrades for Ford, Chevy, and Dodge

From :
The CarTown E-X  Official fan page:
New Legendary Upgrades for Ford, Chevy, and Dodge are here! Please welcome the Stars and Stripes exhausts!

I've been looking forward to these, I tend to be a muscle car and Mazda fan for the most part.
Be sure to come and Race with us.

The following new Legendary rating Upgrades have been added to Workbay Jobs and Upgrade Mystery Boxes:
* Stars and Stripes: Ford Edition
* Stars and Stripes: Chevrolet Edition
* Stars and Stripes: Dodge Edition

In addition, previous Upgrades that were "Ford" restricted have been edited to include "Shelby" models as
well.

Wednesday, October 23, 2013

32 Ford Deuce Dragster

The '32 Ford Deuce Dragster is now available in Car Town EX!
Hostile Racing got one! don't miss out their only available in limited quantities. I opted not to buy extras to merge with since I sort of view this car as a Unitasker.

Tuesday, October 15, 2013

USA Cup Round 3, This Weekend

The USA Cup Round 3 is coming this weekend!
Let's get that American Muscle ready!

I got mine ready!


Bracket A:
Any Ford or Shelby

Open period:
2013/10/18 16:00 〜 2013/10/21 15:00 (Japan Standard Time)


Bracket B:
Any Chevrolet or Chevy

Open period:
2013/10/18 16:00 〜 2013/10/21 15:00 (Japan Standard Time)


Bracket C:
Any Dodge or SRT

Open period:
2013/10/18 16:00 〜 2013/10/21 15:00 (Japan Standard Time)

Tuesday, October 1, 2013

Don't miss the 2010 Ford GT-R GT2

The '10 Ford GT-R GT2 is now available in Car Town EX! You'll have to lat down almost 900k in gold coins to get it but it is a limited run in CT-EX, so be sure to get yours while they last Hostile Racing picked one up today.

Wednesday, September 4, 2013

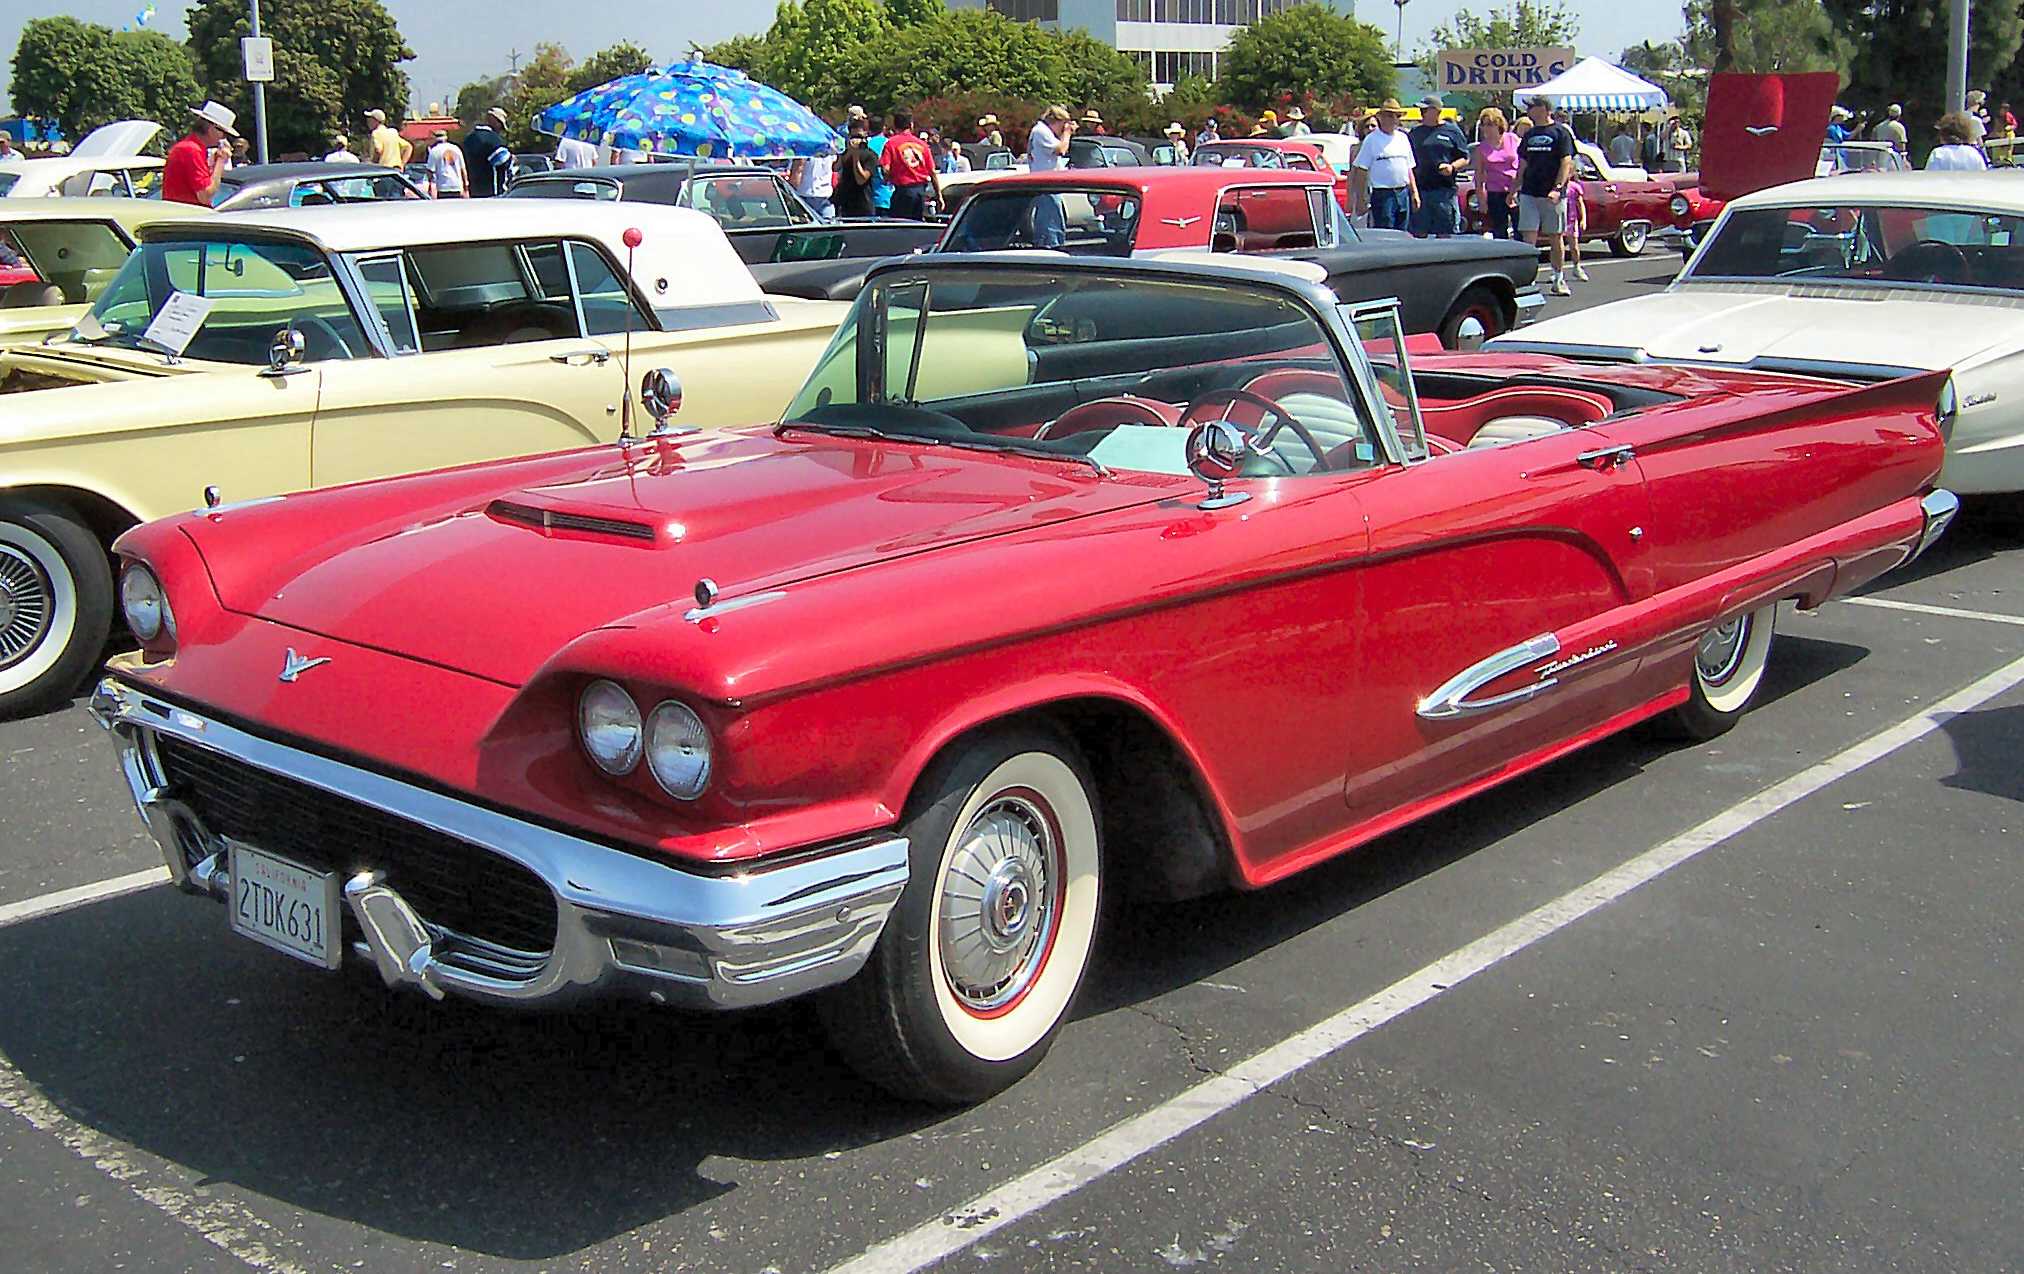
Makin' Thunderbirds

Makin' Thunderbirds


From : http://www.seriouswheels.com/pics-1960-1969/1966-Ford-Thunderbird-blue-convt-fa-sy.jpg


From : http://files.conceptcarz.com/img/Ford/62_Ford_Thunderbird_manu-04.jpg


From : http://upload.wikimedia.org/wikipedia/commons/5/57/1959_Ford_Thunderbird_Convertible.jpg

Sunday, August 18, 2013

1965 Shelby Cobra 427 S/C

The '65 Shelby Cobra 427 S/C is now available in Car Town EX!
Limited time and quantities get yours now!


You can learn a lot about the Cobras Here:http://fordmyworld.blogspot.com/2013/01/ford-shelby-cobra-427-sc.html

Monday, November 7, 2011

2003 Ford Focus Head Gasket Replacement D.O.H.C.

Disconnect the battery and remove it from the vehicle.


Remove the 10, 8mm bolts in the top of the cam cover. Remove the hose going into the cam cover. Lift the cover straight up and off the engine head.

Remove the water tank and the three hoses connected to it, to gain easier access to the front of the engine.


Remove the upper timing cover, exposing the the two cam gears. Loosen the timing belt tensioner with a 10 mm wrench, loosen until you can freely turn the bolt without removing it. Locate the tab behind the tensioner lift the tab from the rectangular slot it rests in. locate the tab with a 6mm hexagonal hole and insert a 6mm allen wrench and turn to the left to draw the tensioner away from the timing belt, this will release the belt for easy removal and replacement.


Loosen the the drive belt tensioner , located below the alternator. This tensioner is operated by placing a wrench on the center bolt and turning the wrench to the right, as if tightening a bolt. Doing this will pull the tensioner away from the belt allowing for easy removal. I suggest removing the belt from one of the lower larger pulleys first.
Do not confuse the drive belt tensioner with the idler pulley located closer to the timing belts. This pulley is not a tensioner and does not move.


Remove the serpentine belt and remove the alternator. Removing the alternator exposes a single bolt that attaches the alternator bracket to the head. It is not necessary to remove the entire mount, only the upper bolt must be removed.

Disconnect the fuel line to the injector fuel rail. remove the injector unit only if you desire it is not required to change the head gasket. It is possible to leave the entire intake manifold in place when you remove the head. We choose a full dis assembly for examination purposes.


Remove the exhaust manifold from both the head and the down pipe or catalytic converter. The exhaust manifold bolts are the most difficult part of this process, due to the very tight space you have to work in.

Remove the cam bearing caps. The caps are numbered in order and marked for direction of placement. Be sure to replace these caps in their proper positions. The here one of the bearing caps is highlighted in red


Remove the cam shafts identify the exhaust cam and intake cam, take note as to their locations the must be returned to the same set of bearings they were removed from.


Remove and tag all vacuum lines and wiring harnesses, the main engine harness is located on the firewall just off center to the passenger side of the engine bay.


Remove the water inlet at the driver side end of the head and fold the hose and water plenum unit out of the way.


Cams removed you can remove the head bolts. There are 10(ten, 55mm torx head bolts. most of the gasket manufactures suggest replacing the head bolts with a new set when you replace the head.


With all the bolts removed lift the head slightly from the driver side to break the existing gasket seal. Lift the head straight up and away from the engine block. There will be two locating pins in either the head or the block, in most cases one will stay in the block and one in the head, be careful and do not let these get away from you.


Replacing the head


Begin by cleaning and checking the mating surfaces of both the head and the engine block. With the head and block clean check both surfaces with a straight edge such as a metal ruler. If the mating surfaces appear to be flat proceed to the next step.


Place the new gasket onto the engine block and seat it in place with the two locating pins mentioned earlier. The head gasket is laminated steel ,rubber and steel and should not require any type of extra sealant.


Gasket in place check one final time for cleanliness, it is also a good time to bring the first piston to top dead center and mark the lower pully in a recognizable fashion. You may also wish to place the alternator into place without the bolts before you mount the head this will give you a little more room to work. When you have completed this bolt the head into place with the 10, 55mm torx bolts. The only information I found about torqing these belts specified placing the bolts 60 ft.lbs, you may have a more reliable source to research. We chose to go with the 60 ft. lbs and have had no problems.


The factory installed crank shaft pulley has no timing marks. The timing is normally set using a screw in crank stop pin and a 5mm bar to line up the slots on the rear of the cam. I chose to find top dead center and set the cams using the 5mm bar. The bar slides into the offset slots on the rear of the cam when the bar fits in both slots and lays flat on the heads deck the cams are perfectly timed. Once the cams are aligned and locked with the bar in place use the 6mmallen wrench to pull the tensioner away from the belt and slide the belt back up and over the gears.


With the belt in place you can retrieve the small tab you released from the timing cover earlier, and place the tab into the slot in the timing cover behind the tensioner. Use the allen wrench to place some pressure on the timing belt and tighten the center bolt on the tensioner. Remove the bar from the rear of the cams.

Replace all the external components to the engine, hoses wiring various brackets. Reinstall the water plenum onto the passenger side of the head. Reconnect the battery crank the engine and check for oil and water leaks.